DIY: Homegrown Carrot Cake
This Summer, my neighbor gave me a pot of carrots to grow and tend to. After a couple weeks, I grew too impatient to wait any longer so I decided to harvest them and bake a carrot cake.
Personally, I’ve never baked a carrot cake before, but when I think of this dessert in particular, I think of a sneaky yet delicious way to hide one of the vegetables I least enjoy eating. To me, the most optimal carrot cakes are moist, lightly sweetened, topped with fresh cream cheese frosting, and have the perfect ratio of nuts, raisins, and grated carrots.
Starting with harvesting my tiny homegrown carrots, here is my full baking process. For full step by step instructions and original recipe, click here.

Step 1: Pluck carrots from the pot and clean off.


Step 2: Mix together dry ingredients: flour, baking soda, salt, and the cinnamon.

Step 3: Combine wet ingredients: the oil, sugars, and vanilla. Whisk in eggs, one at a time, until combined

Step 4: Grate carrots. I used a few store bought carrots as well because my homegrown ones were simply too tiny.


Step 5: Chop walnuts (or your nut of choice). If you so desire, add raisins.


Step 6: Slowly combine wet and dry ingredients. Then add in carrots, walnuts, and raisins.


Step 7: Pour batter into pre greased and floured cake tins. Place in oven and bake.

Step 8: While batter is baking, prepare the cream cheese frosting. I used about half of the sugar specified on the recipe to have a lightly sweetened frosting.

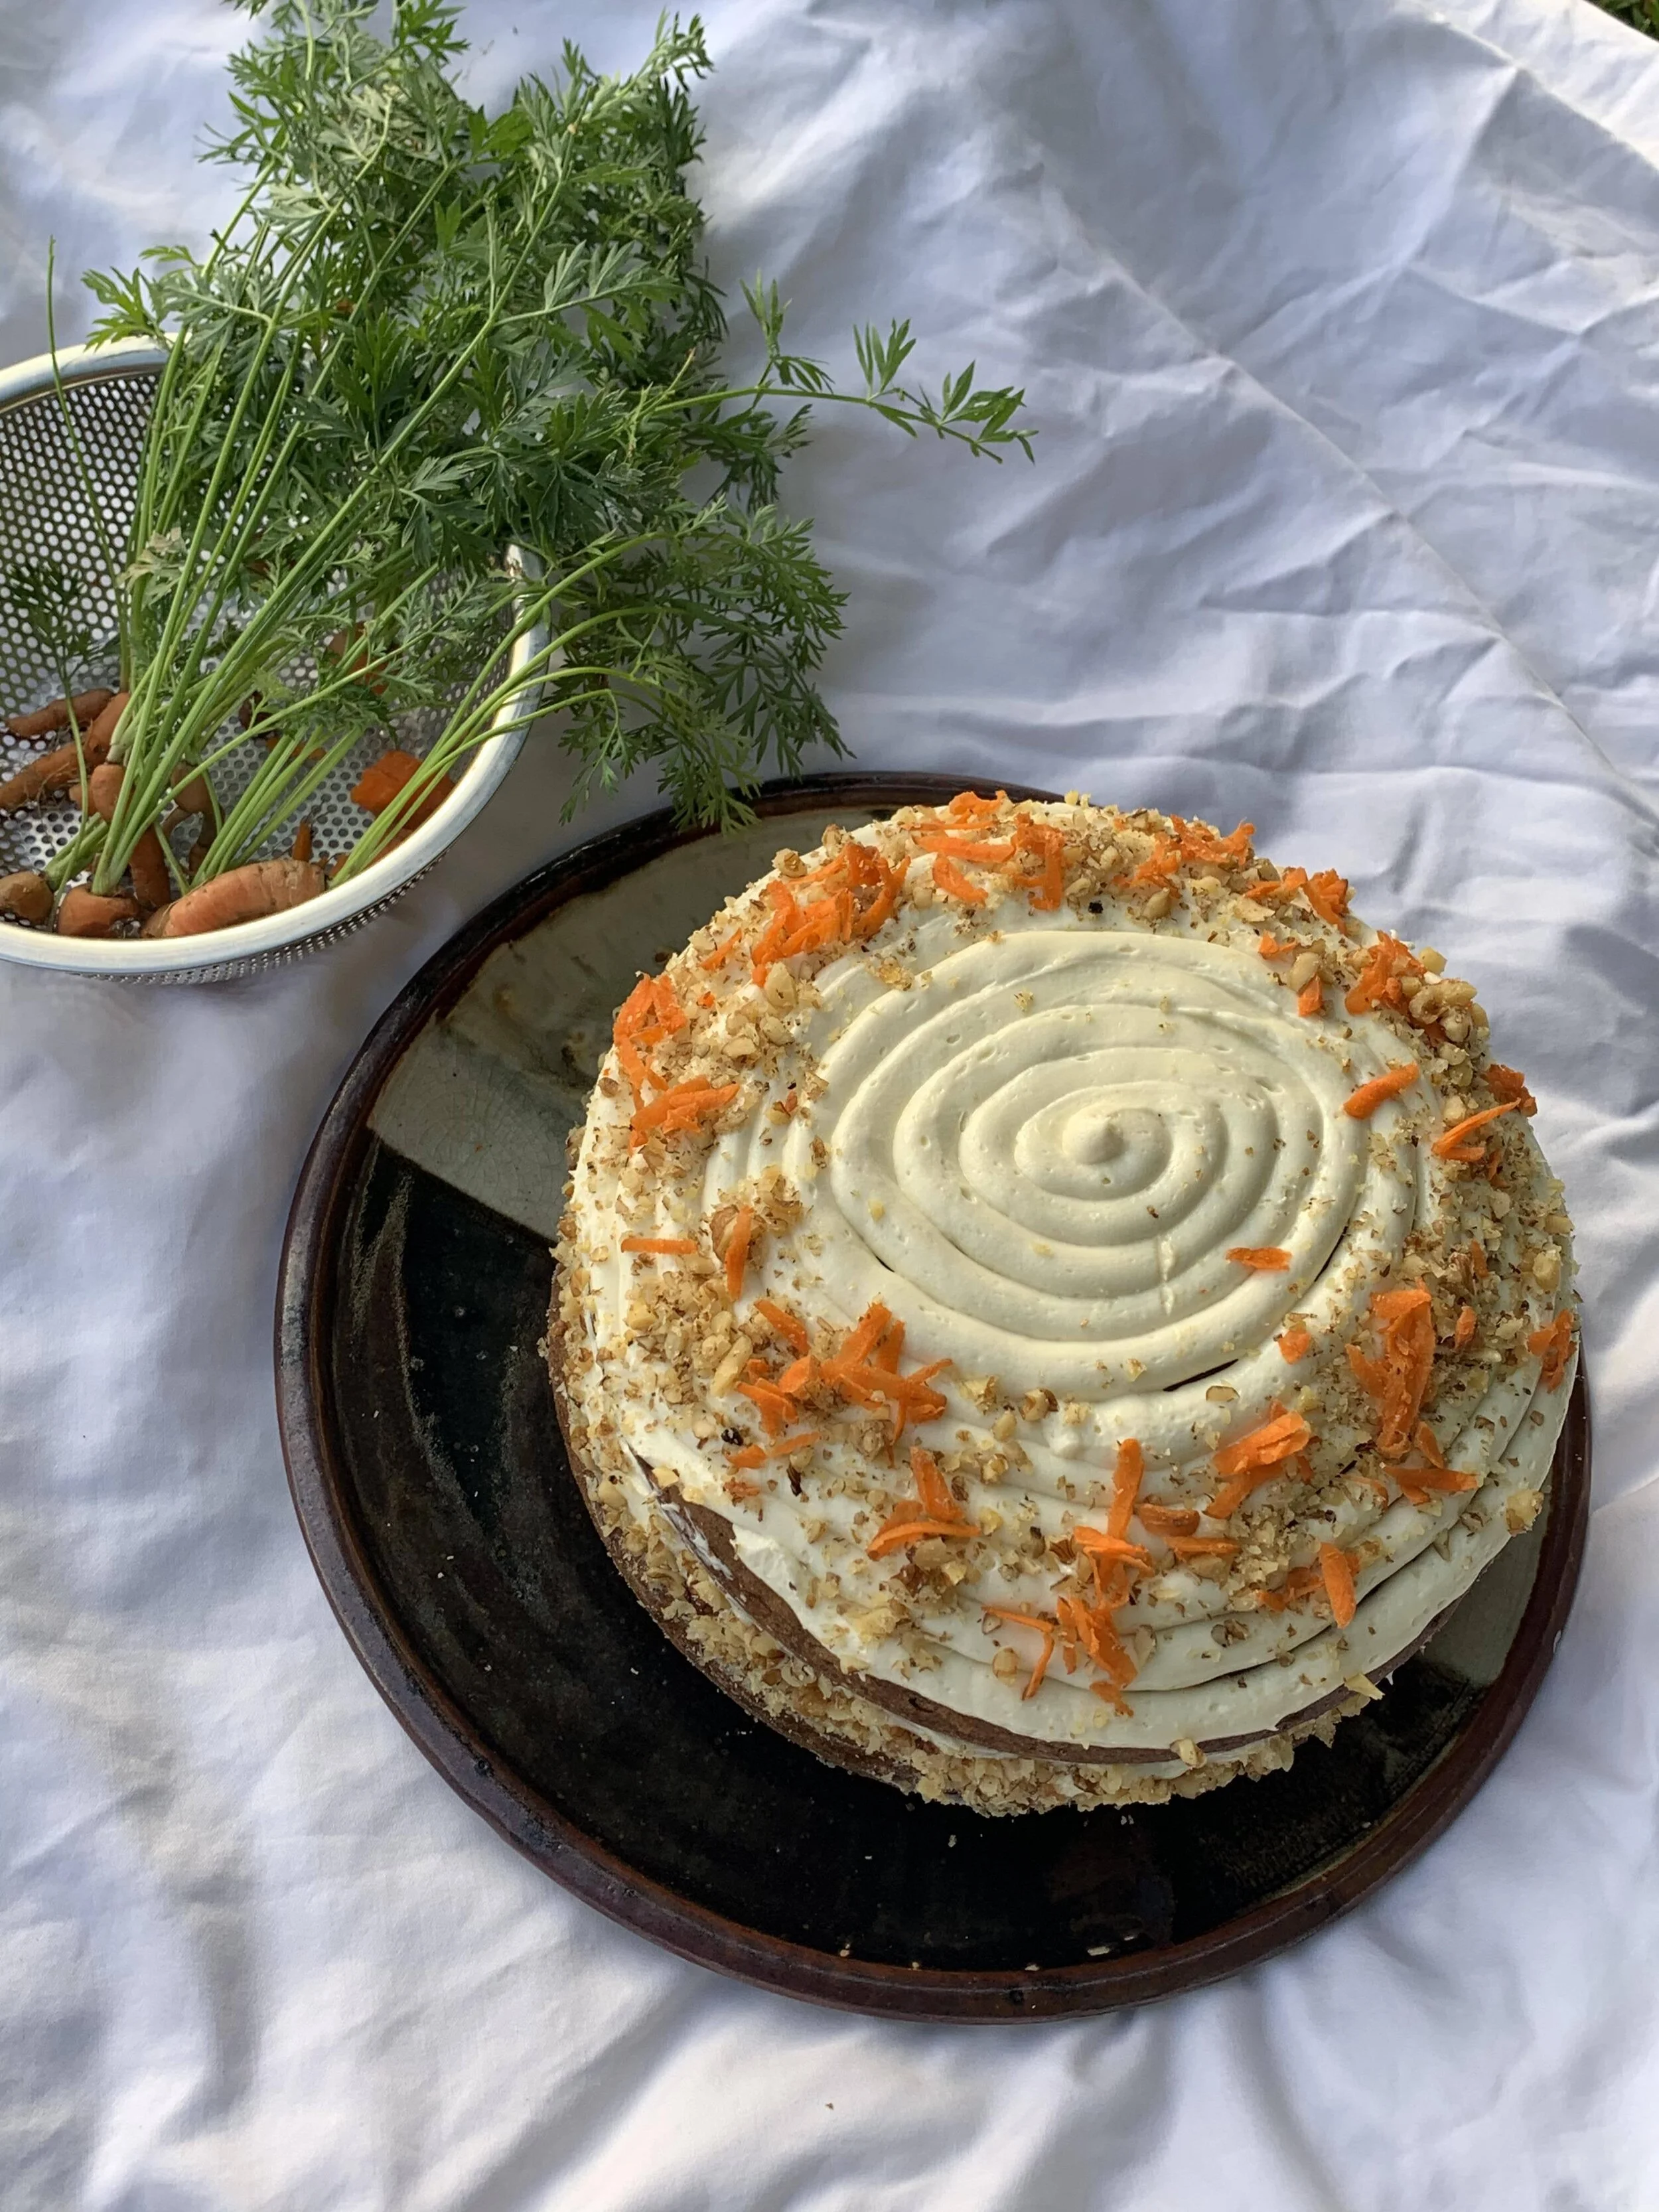
Step 9: Once the cake is done baking and cooled off, remove from the tins. Then the fun part of decorating and frosting begins! I frosted my cake using piping bags to create a spiral design on the top of my cake.


Ta-Da! Cake is ready to serve and eat.


Overall the process of baking, taking photos of the process, and decorating took about five hours. Granted, I like to take my sweet time when it comes to attempting a new recipe for the first time. If you’re not a huge fan of vegetables like me, carrot cake is a great way to pretend to eat something healthy ;)
Have a great weekend!
Ella Kol