

DIY: Knit Bralette
A really quick and easy knit project for beginners!
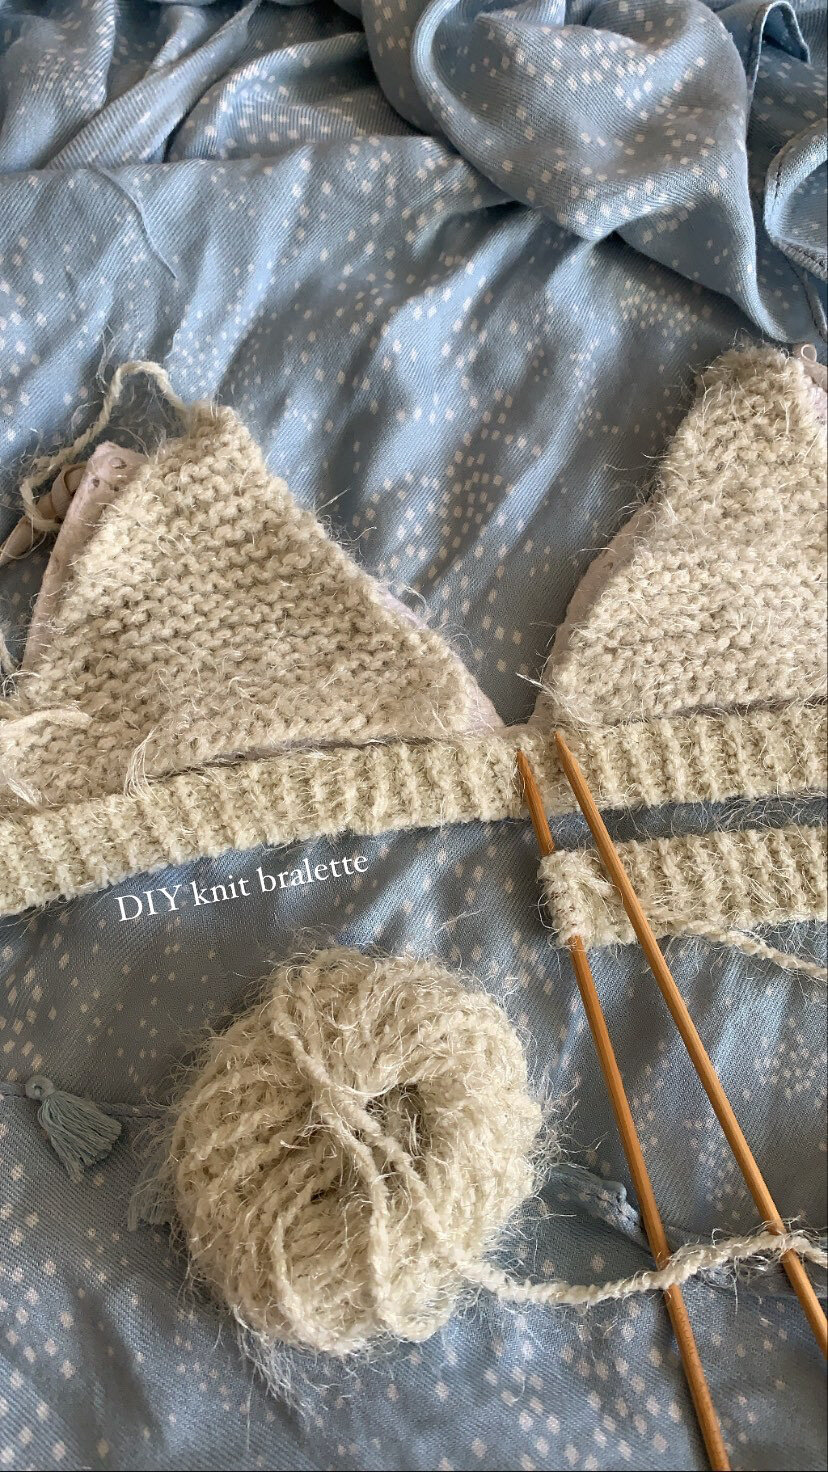
Step 1: Knit the waistband. The width of my waistband is five stitches. This will vary depending on how much support or coverage you want. If you knit a wider waistband, you could end up with a cute cami shape instead of a bralette. Up to you!
Step 2: Knit the bralette cups. The width of my bralette cups are twenty-five stitches. This will of course vary depending on your bust size and how much coverage you want. After knitting two rows, I’d gather two stitches together to slowly decrease the width of the triangles. For me, this was just trial and error since I didn’t want the triangles to end up being too narrow.
The next time I attempt the bralette, I think I would make the triangles a bit wider for more coverage.
Step 3: Knit the shoulder straps. I wanted really dainty bralette straps, so the width of the straps is only two stitches.
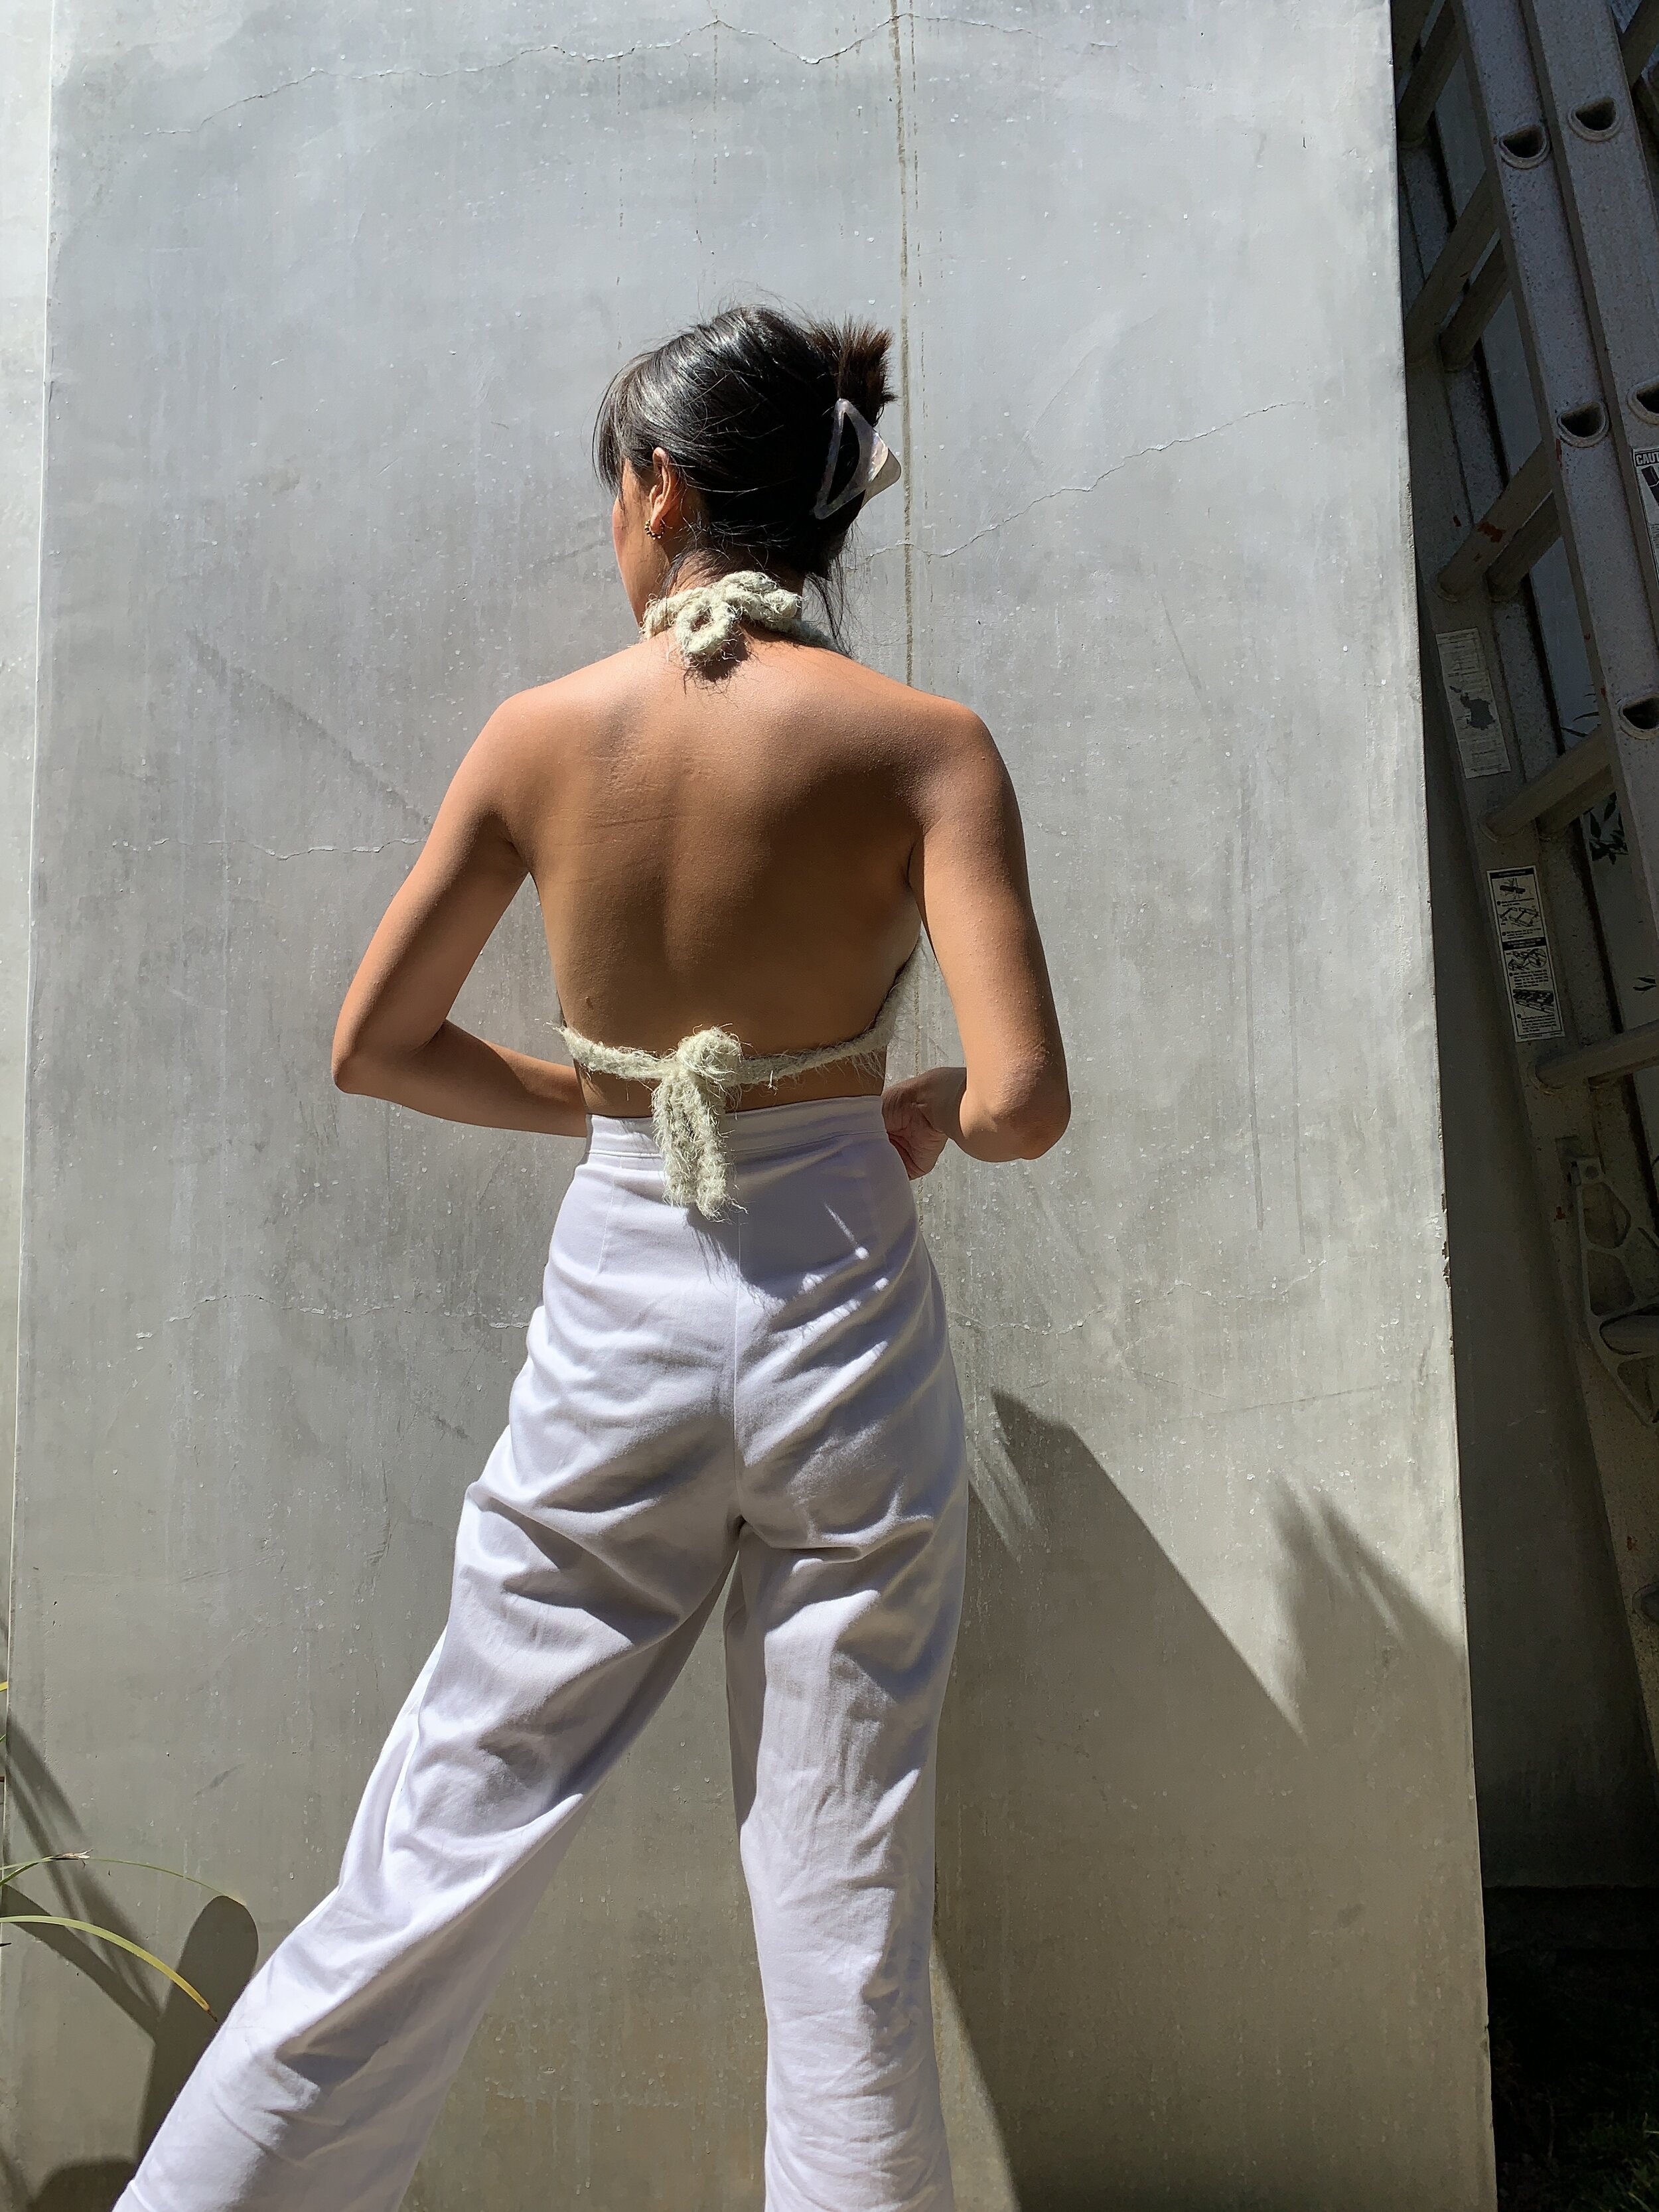
Note: Depending on the kind of yarn you choose to use, I advise stretching out your straps and triangles to see what the actual length and width of your pieces will look like. The yarn I used was pretty stretchy so I didn’t have to be 100% accurate with my measurements. The triangle cups will morph to the shape of your chest, so if it’s not perfect or they didn’t turn out looking exactly the same, chances are, it’ll still look okay when you wear it!


Thank you for reading! Please feel free to like, share, or leave a comment down below! Any suggestions on what I should knit next? My friend just adopted the cutest corgi pup, so I’m going to try to knit him a few bandanas.
xx
Ella Kol


